Appearance
Overview
Migrating a subsite from a WordPress Multisite network to a new single WordPress site involves transferring the content, themes, plugins, and settings from the selected subsite to a standalone WordPress installation. This process ensures that the subsite is moved seamlessly while retaining data integrity and minimizing downtime.
Before starting the migration, ensure that both the source Multisite network and the target single WordPress site are properly set up and that you have administrative access to both. Install and Activate Everest Backup on the source network. If the backup file is too large, you will also need the Everest Backup Unlimited Add-on to handle the migration efficiently.
Note
You must have Everest Backup Plugin in both of the Multisite for Backup, Restore as well as Migration/Clone.
How to Start a Subsite Backup from Multisite
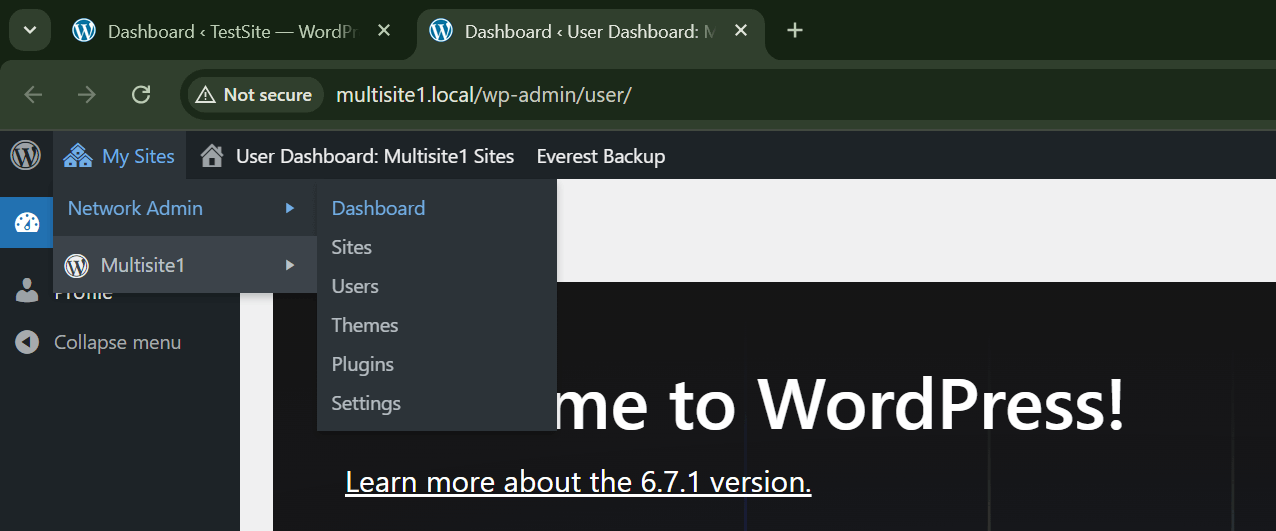
1. Access the Network Admin Dashboard:
- Log in to the Network Admin Dashboard of your WordPress Multisite.
2. Navigate to Everest Backup:
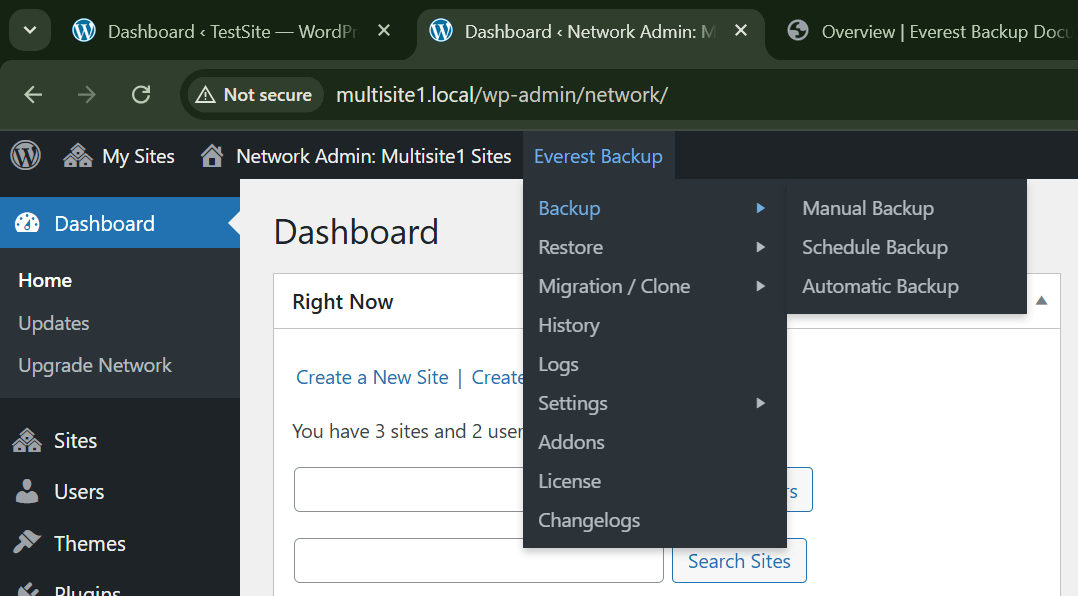
- Click on Everest Backup → Backup in the menu.
3. Choose the Backup Type:
- Select the type of backup you want to perform:c
Manual Backup
Scheduled Backup
Automatic Backup
4. Exclude Specific Items (Optional):
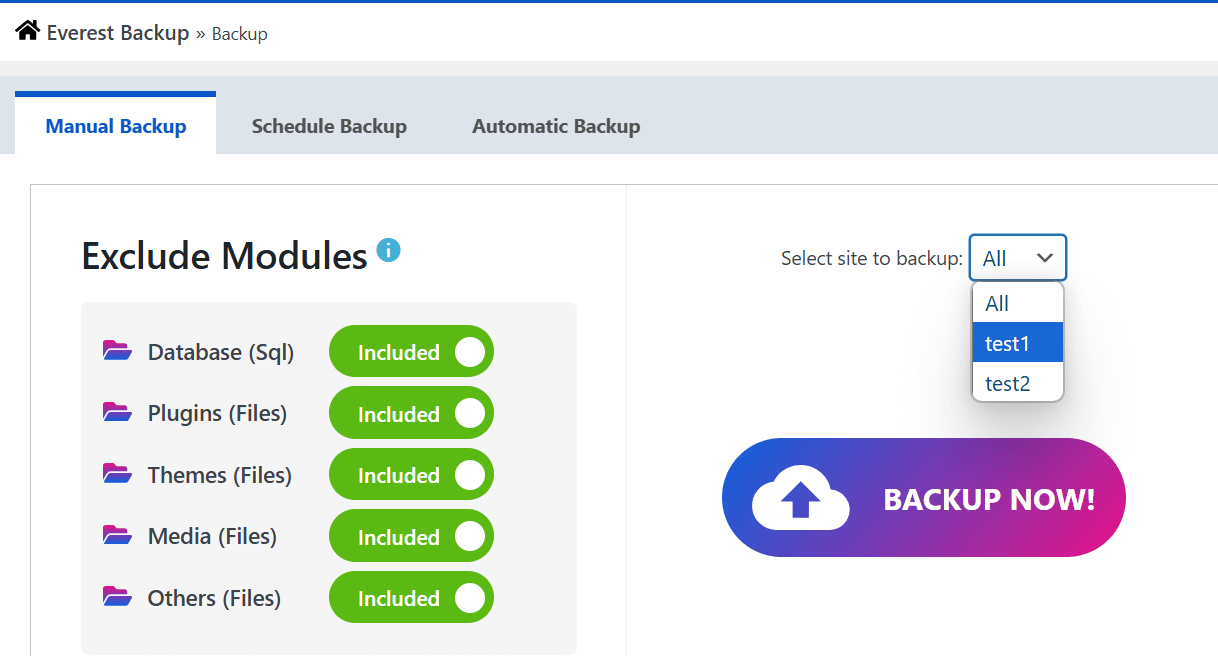
- If you wish to exclude certain items like themes, plugins, or the database:
- Use the exclusion options to select what you don’t want to include in the backup.
5. Select the Subsite:
- Unlike the standard process where "All" is selected, in this case:
- From the dropdown menu, Select the Specific Subsite that you wish to back up.
- Ensure that only the selected subsite is included in the backup.
6. Specify a Backup Location (Optional):
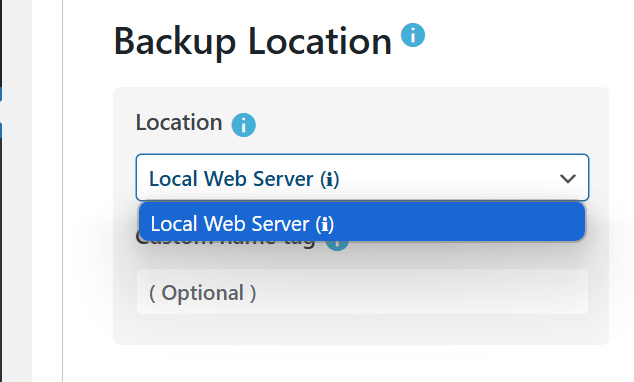
- If you want to store your backup in a specific location, such as Google Drive, OneDrive, AWS S3, pCloud, etc.
- Add the respective Everest Backup Cloud Add-on.
- Configure its settings in Everest Backup → Cloud Settings.
- Once configured, select the location and provide a custom name for the backup file.
7. Start the Backup
- Click the “BACKUP NOW” button to initiate the process.
The plugin will now create a full backup of your subsite network based on your selections.
Restore the Subsite Backup to a New Single WordPress Site
1. Set Up a New WordPress Installation
- Install a fresh WordPress site on the target domain or subdomain.
2. Install Everest Backup on the New Site
- Ensure that Everest Backup is installed and activated on the new single WordPress site.

3. Go to Everest Backup: Restore
- In the new WordPress site’s admin dashboard, go to Everest Backup → Restore.
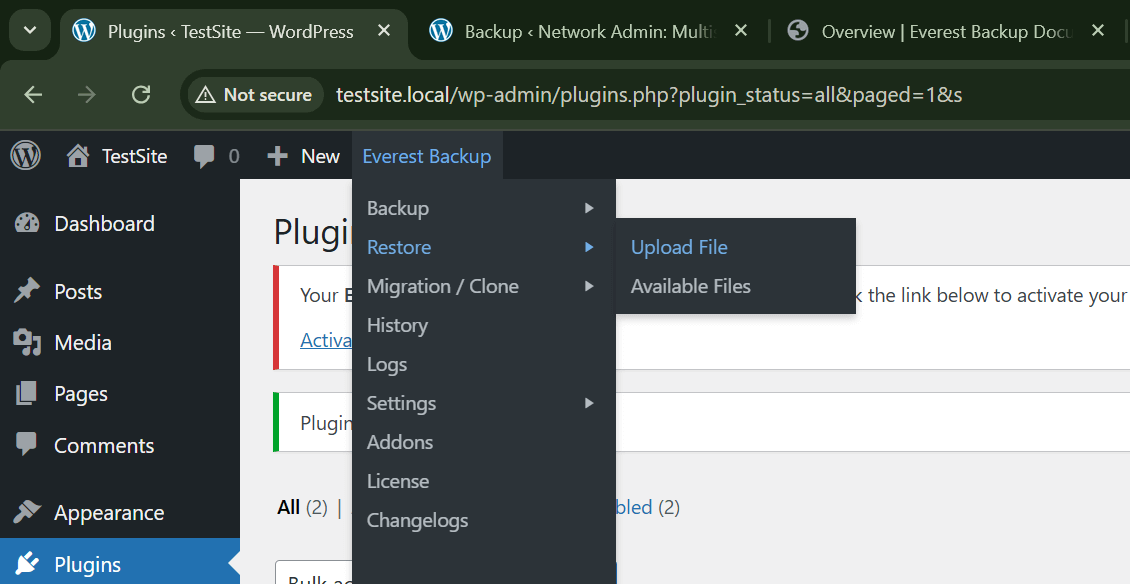
4. Upload the Backup File
- Upload the backup file from the Multisite subsite to the new WordPress installation.
5. Select the Backup to Restore
- Choose the backup file you want to use for restoration from the list or uploaded files.
6. Start the Restore Process
- Click the Restore button to begin. The plugin will restore all content, themes, plugins, and settings from the backup file.
7. Verify the Restore
- After the process completes, check your new WordPress site to ensure that all the data, themes, plugins, and settings have been successfully transferred.
By following these steps, you can quickly and efficiently recover your Multisite network when needed.
Migration / Cloning of a Subsite to SingleSite
1. Access the Network Admin Dashboard:
- Go to the Network Admin Dashboard of the Multisite in which you want to clone.

2. Navigate to Everest Backup:
- Click on Everest Backup → Migration/Clone in the menu.
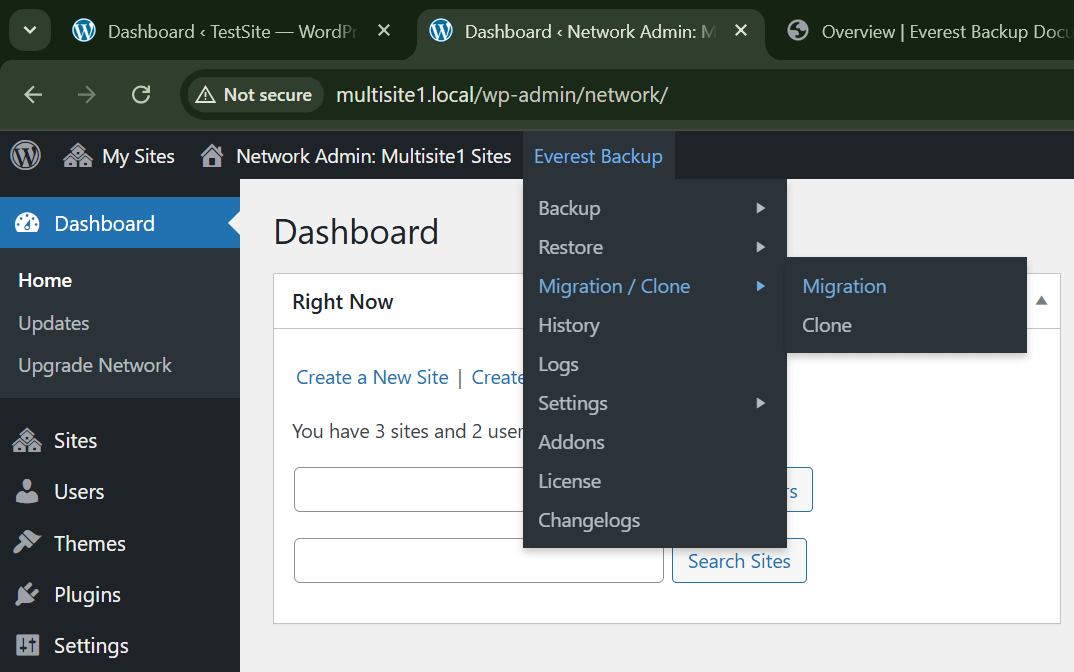
3. Paste the Migration Key:
- Copy the Migration key generated from the subsite after backup is finished and paste it.
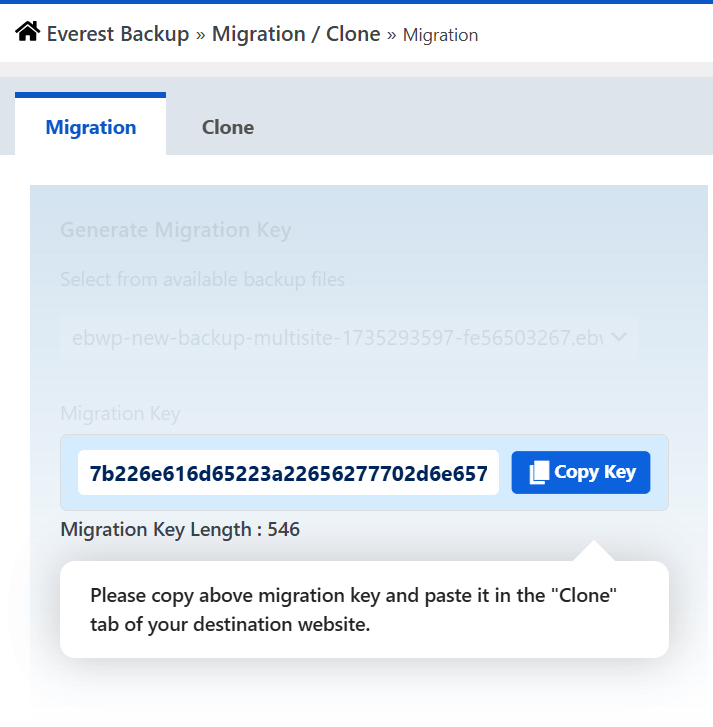
4. Select Clone:
- After the migration key is verified, select the Clone button.
5. Verify the Cloning:
- After the process completes, check your single site to ensure the site is cloned perfectly.
By following these steps, you can quickly and efficiently migrate/clone your subsite from a WordPress Multisite network to a new single WordPress site .
Best Practices
- Regular Backups: Schedule regular backups to ensure your Multisite subsite data is always up to date and protected against unexpected data loss.
- Verify Backup Integrity: After creating a backup, test it to confirm that all data, including themes, plugins, and settings, is properly saved and transferable to the new site.
- Use Exclusions Wisely: Exclude unnecessary files like unused themes or plugins to reduce backup size and time, ensuring only the essential data is migrated.
- Secure Your Backup Files: Store backups in secure, remote locations like Google Drive, AWS S3, or OneDrive to protect them from server failures and potential data loss.
- Name Backups Clearly: Use descriptive names for your backup files (e.g., “SubsiteBackup-Dec2024”) to make them easily identifiable and organized.
- Monitor Storage Space: Regularly check storage space on remote locations where backups are stored and configure automatic cleanup settings to remove outdated backups, ensuring you don't exceed storage limits.

