Appearance
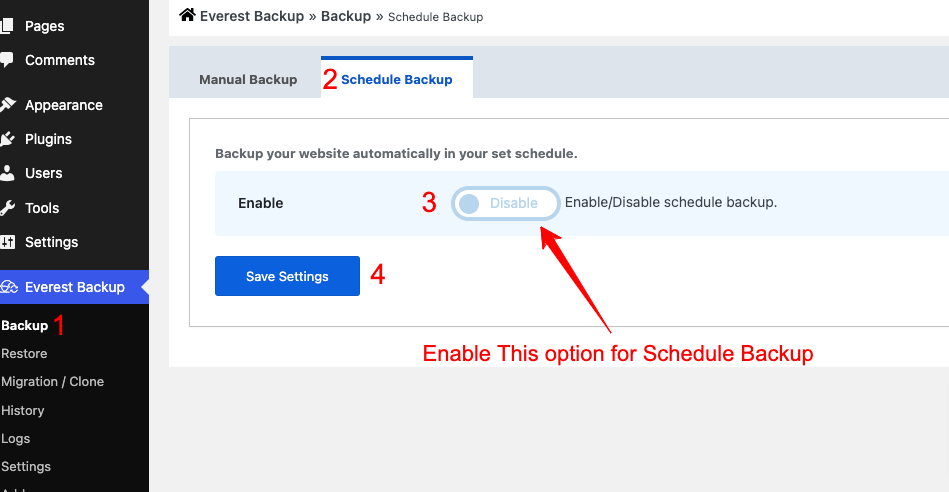
To Enable Schedule Backup, Navigate to
Everest Backup -> Backup -> Schedule Backup Click Enable and select your backup options and lastly save your settings. As shown in below screenshot.
After Enabling Schedule Backup you will see this screen
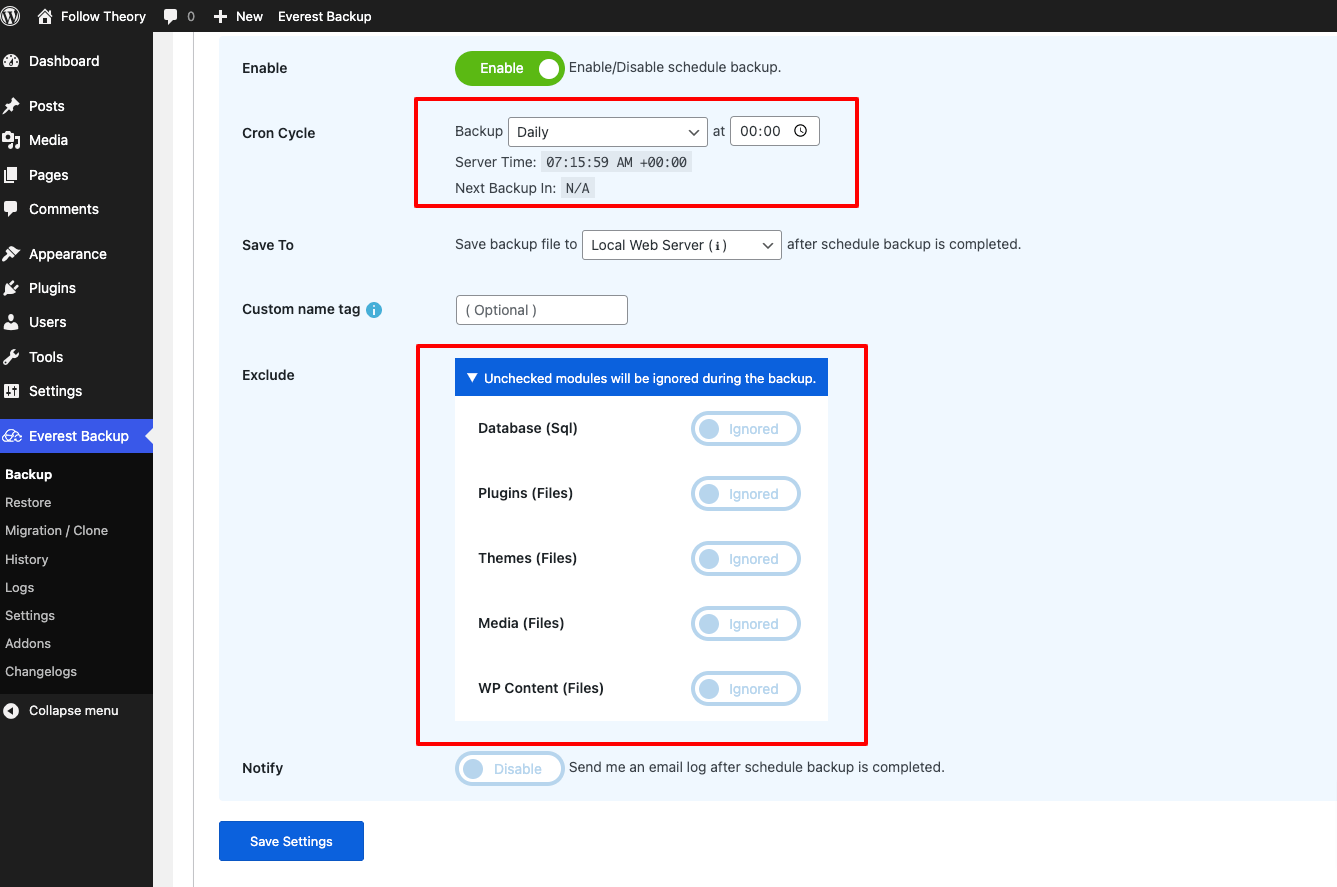
By Default Backup Modules are Ignored You have to Enable Backup Module as per your requirement.
Below Screenshot is the Example of Enabling Schedule Backup of Entire Website. 
Terms Used in Everest Backup Plugin
Cron Cycle : You can select your backup schedule Cycle.
Save To : You can select a location to save your backups file.
Delete From Local Web Server : If this options is set Yes, that means once your file uploaded successfully to Google Drive / any cloud then our Backup system auto delete Backup Files from your hosting server to save your hosting space.
Custom name tag : ( Optional ) You can tag your Backup for future user.
Some Examples of Custom tag : entire-website-backup or
database-only
Exclude / Enclude Module : You can choose to Include or Exclude certain Files from your backups.
By default, everything is Excluded in the backup, however you can Enable / Disable to certain options and thereby exclude / include specific Modules from being backed up.
Notify : If you have enabled notifications, you will receive an email log once the scheduled backup is completed
Advanced Notifications Only Available in Pro Version