Appearance
How to Install and Activate Amazon S3
Welcome! We're excited to introduce you to our premium Amazon S3 addon. If you haven't purchased it yet, don't wait any longer! Click the Buy Now" button to get started.
After you make your purchase,
check your email inbox for a message from us
Note
The same Email Address that you have used at the time of purchase.
Sometimes it may land in your spam or other folder, so make sure to keep an eye out. In that message, you'll find a download link and a license key.
Using the provided link, download the Amazon S3 addon and upload it to your WordPress Plugin area (located in Plugin -> Add New -> Upload Plugin).
Note
Keep in mind that you don't need to unzip the download, and be sure to double-check that it's in ZIP format.
Now it's time to install and activate the addon!
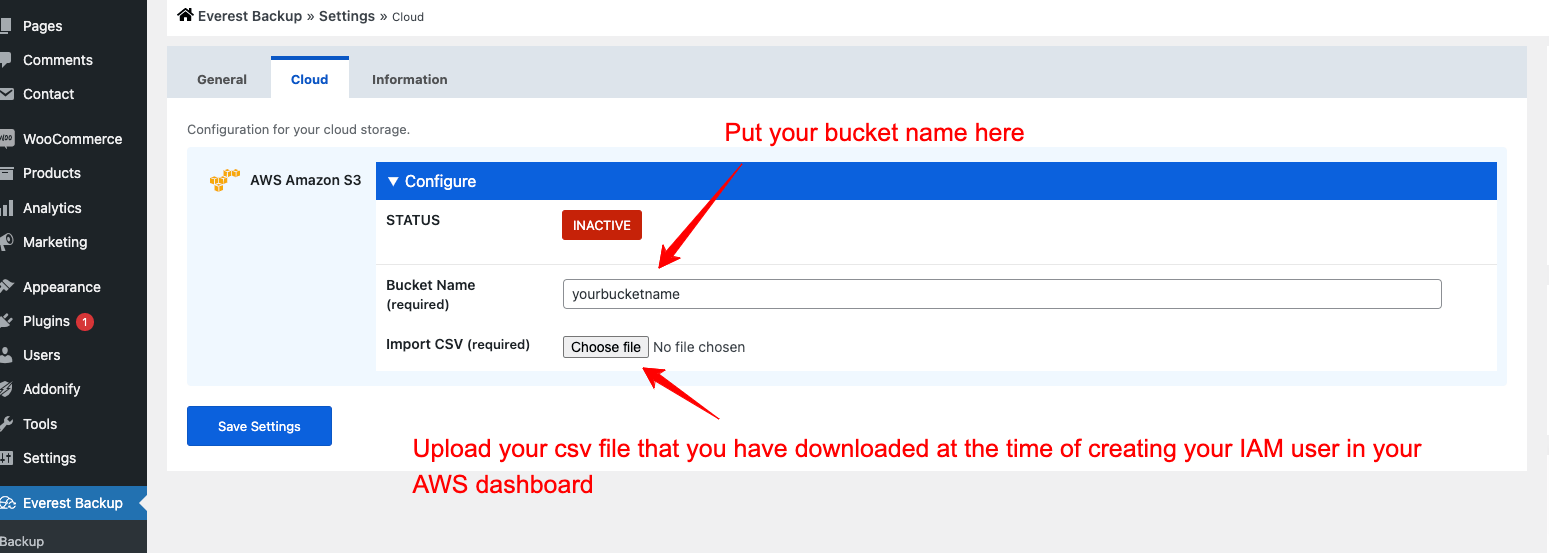
Once that's done, you'll want to configure it by navigating to the Everest Backup Menu -> Settings -> Cloud.
We need Two things to connect Everest Backup AWS S3 with your WordPress Website.
1. Bucket name ( Your AWS S3 bucket name that you have created )
2. Your IAM user CSV files ( Credential download files )
To know more detailed step by step on how to create Bucket name and AMI users credentials CSV file